A Step-by-Step Guide (3 Easy Options)
Clearing your website cache is a quick and effective way to resolve display issues, ensure visitors see the latest changes, and improve overall site performance. Whether you’re updating your design, fixing bugs, or tweaking content, caching might cause your old content to stick around longer than you’d like.
Here’s a simple step-by-step guide to clearing your website cache. You can choose any one, a combination, or all of the options depending on how your site is configured.
Option 1: Clear Cache with Elementor
If you’re using Elementor, the visual builder for WordPress, it has its own internal caching system.
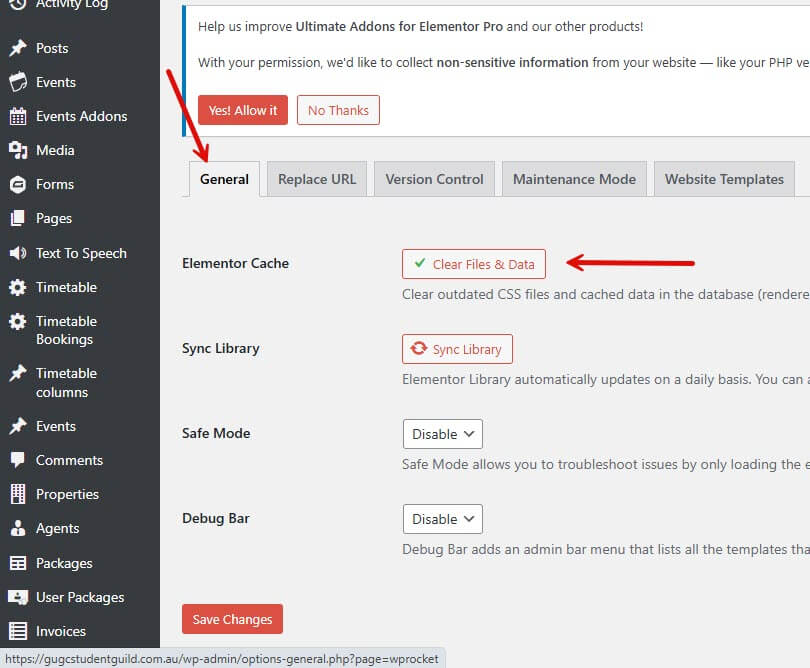
Steps to Clear Elementor Cache:
- Log into your WordPress Dashboard.
- Go to Elementor > Settings.
- Navigate to the Tools tab.
- Click the button “Clear Cache” or “Regenerate CSS & Data”.
This will remove any cached CSS and layout files created by Elementor.
Option 2: Clear and Preload Cache with WP Rocket
WP Rocket is a premium caching plugin for WordPress that optimises performance by creating cached versions of your pages.
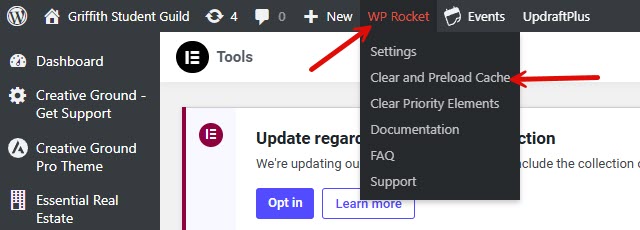
Steps to Clear WP Rocket Cache:
- Log into your WordPress Dashboard.
- Go to Settings > WP Rocket.
- In the Dashboard tab, click on “Clear Cache”.
- Then click “Preload Cache” to rebuild the cache automatically with the latest version of your content.
This ensures users and search engines get the freshest, fastest version of your site.
Option 3: Purge Cloudflare Cache
If you use Cloudflare as a CDN (Content Delivery Network), it caches static content (like images, stylesheets, and JavaScript) at the edge.
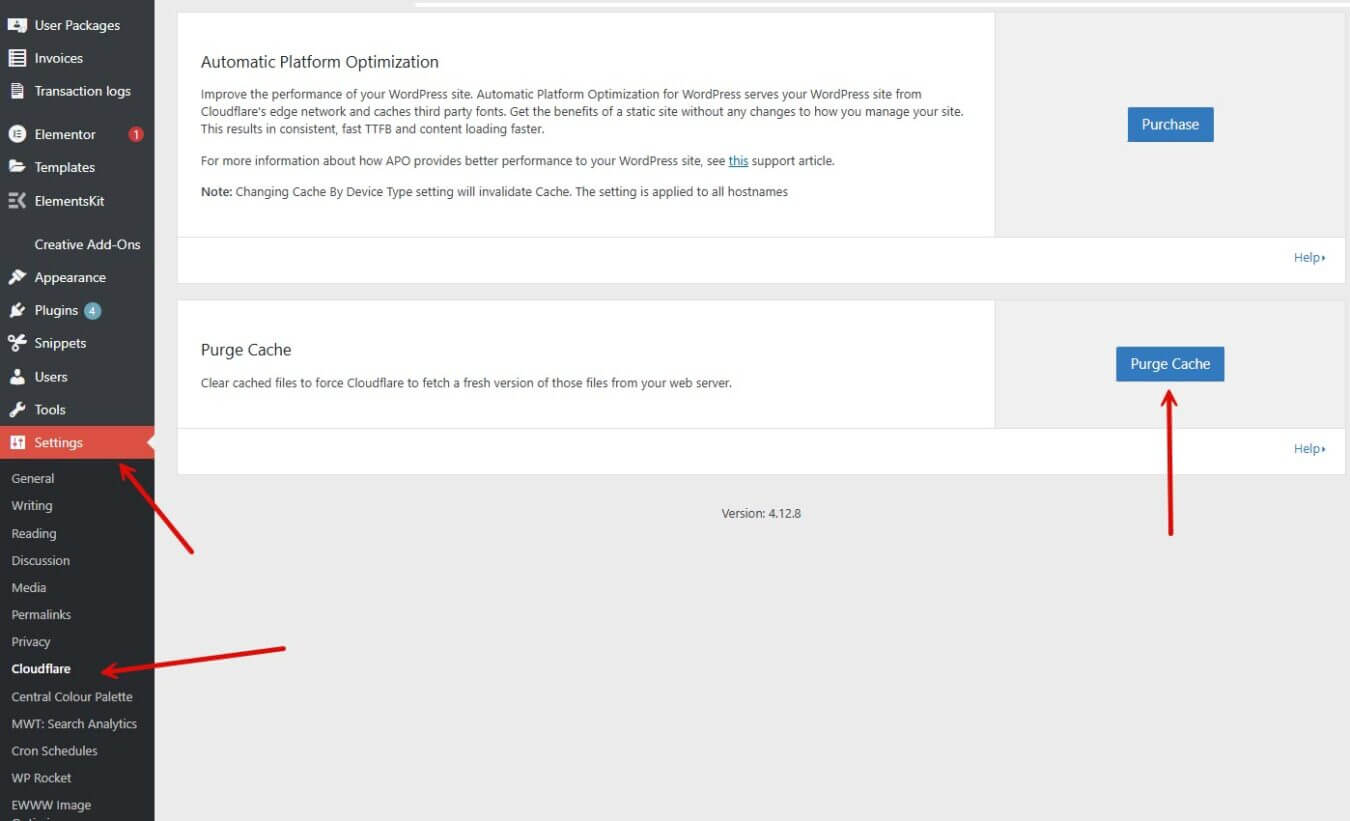
Steps to Purge Cloudflare Cache directly from YOUR WEBSITE
- Log in to your WordPress Website Dashboard
- Navigate to Settings and select “Cloudflare”
- Scroll down to “Purge Cache“
- Choose “Purge Everything” to clear all cached content.
This forces Cloudflare to fetch fresh files directly from your server.
NOTE: If you are unable to see Cloudflare on the backend of your wordpress website, then you will need to follow these steps instead:
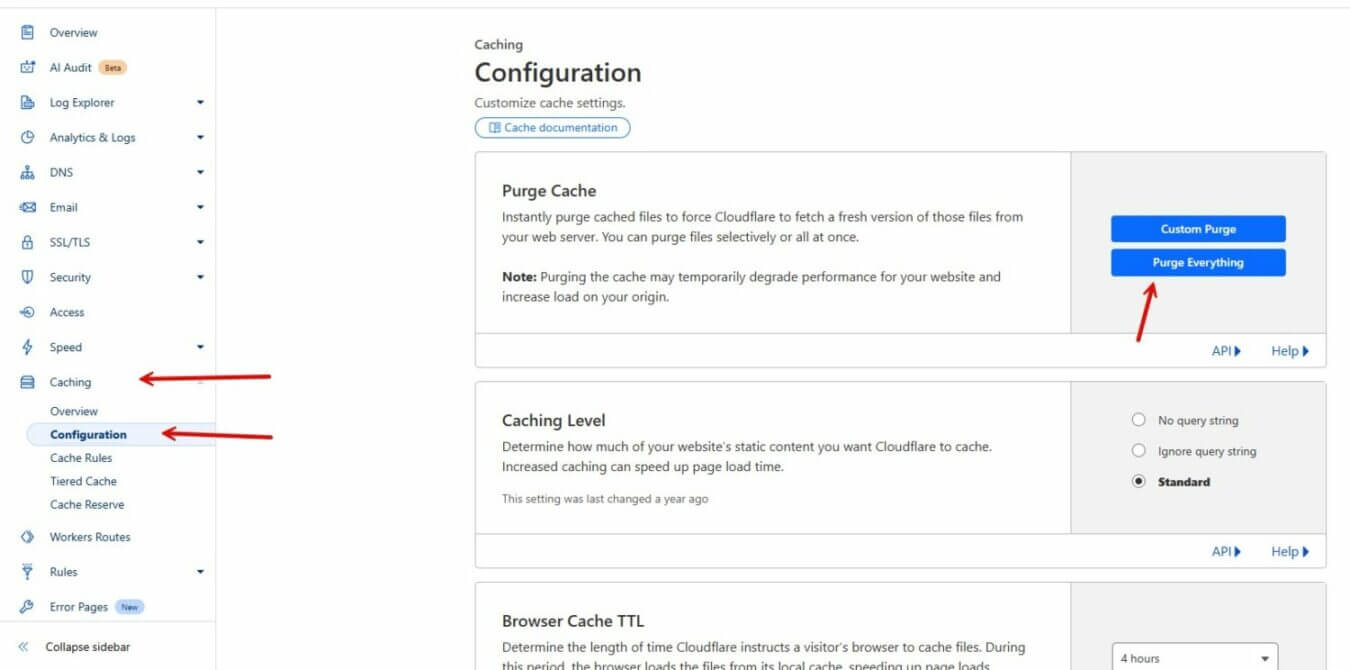
Steps to Purge Cloudflare Cache directly from CLOUDFLARE:
- Log in to your Cloudflare Dashboard at dash.cloudflare.com.
- Select the domain you want to manage.
- Navigate to the “Caching” tab on the left-hand menu.
- Click “Configuration” > “Purge Cache”.
- Choose “Purge Everything” to clear all cached content.
This forces Cloudflare to fetch fresh files directly from your server.
Pro Tip: When Should You Use All Three?
If you’ve made changes and still don’t see them reflected on your live site — even after clearing one cache — try clearing all three layers:
- Elementor for layout and design-related cache.
- WP Rocket for server-side page caching.
- Cloudflare for edge and CDN-level caching.
This all-in approach guarantees that every level of cache is wiped and refreshed.
Bonus: Clear Browser Cache (User-Side)
Sometimes, your own browser may still hold on to old files. You can ask your visitors (or do this yourself) to hard refresh the page:
- On Windows:
Ctrl + F5 - On Mac:
Cmd + Shift + R
Final Thoughts
Caching is essential for performance, but it can get in the way when making updates. Using any of these cache-clearing methods — or all three together — will help ensure your visitors always see the latest version of your website.
Have any questions or still seeing issues? Feel free to reach out


